Day 40

The video for today took way too long to record, mostly due to issues with the new potential camera setup. The thing is, up until this point I’ve been using the camera on my smartphone to record the videos, as it would record 1080p and was handy. I’d love to get my hands on a real camera, but it’s just a much bigger expense than I can justify at this stage.

Overall the phone method is more or less fine. The problem comes in with the combination of using the phone as my video source, and Blender as my video editor. See, Blender has, at least what I consider to be, a really intuitive video sequence editor built in, and since I’ve been working in Blender anyway it just made more sense to use that than anything else, especially since the “really good” video editors are also really expensive. Generally speaking it’s pretty feature rich as well, and automatically ties in if you want to add 3d objects to your video stream. It’s kind of a no-brainer, really. The one area it seems to really have trouble with, though, is mixing source videos with different frame rates. None of the proposed solutions I’ve tried has actually worked for me so far.

Why is that an issue when using the phone, you ask? Well, it’s because the camera on the phone seems is much more worried about taking decent quality video than it is about keeping a consistent frame rate. Even with camera apps that do allow you to request a specific frame rate I have not been able to reliably record a video and know what the rate is going to be beforehand. For the vlog videos this isn’t really a problem, it doesn’t matter what the framerate actually is, since everything that’s being added to them is being combined in post. Where this becomes a problem is any time I want to be able to combine more than one video clip. Say, including a secondary video I made along with my commentary video, or more likely, including an animated introduction or transition scenes as I plan to do with my game tutorial series.

So what’s a guy on a budget to do? Well, I took a gamble and decided to try going with a webcam. Way cheaper than a professional camera, and iffy on whether or not it will be decent enough quality, but it does have its advantages. I can record directly on the computer, so I don’t have to worry about the battery dying, or trying to connect with it over my unreliable wifi, and I don’t have to wait for the file transfer before editing, if I actually have time after recording to edit right away. I’m at least trying to use OBS, which is the software I’m looking at for game and screen recording, so it should be a consistent recording environment. And I’m already set up if I ever decide to get into streaming or doing software tutorials. But the main goal is to be able to get reliably consistent frame rates off of the videos.

Wow, this entire entry ended up just being about the last little bit of the day. Long story short, I had a heck of a time trying to set up the software with the new camera and getting it to record with any kind of quality or the slightest amount of audio sync. I think I finally got it, but I’d like to see if I can get the video quality improved any for the next time.

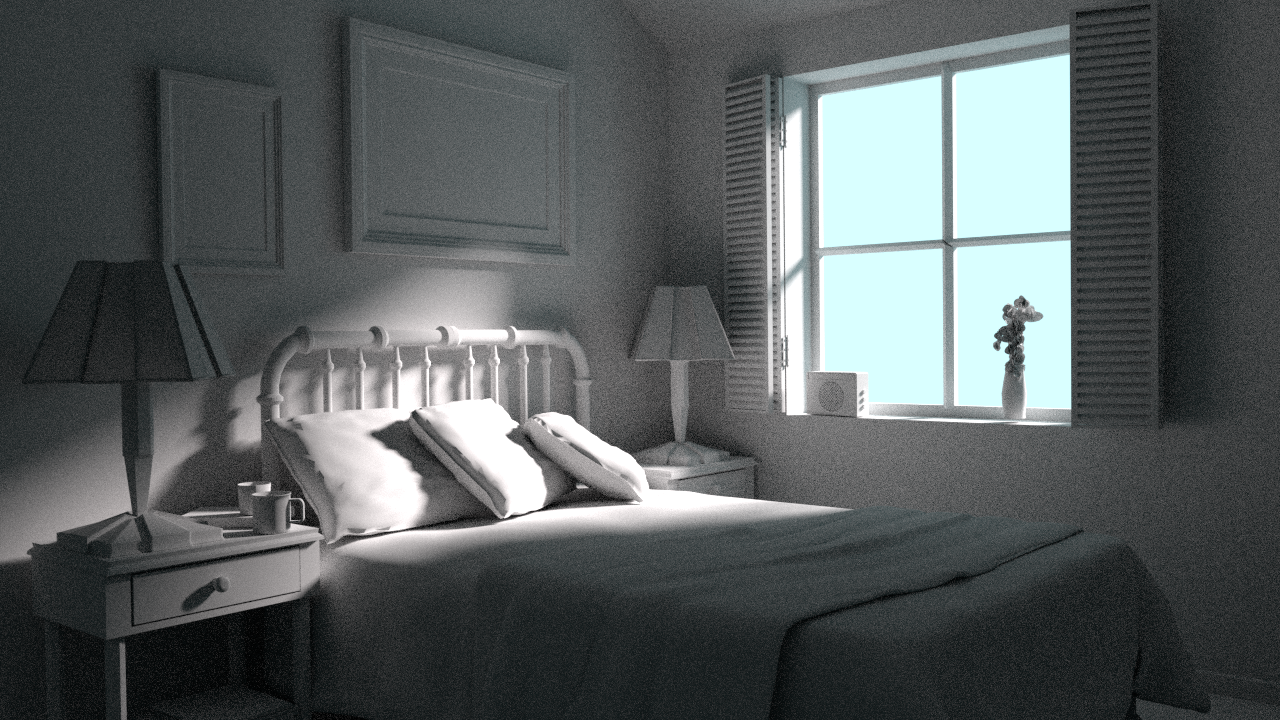
Aside from video fun, a lot of the work today revolved around actually rendering the previous video. I’m not going to dive into that too much, but the short version is that I wanted to use an animation, and it was going to take a full 78 hours to render, so I had to scrap that idea, render out a much shorter looping version over the course of 30 minutes instead, and then use that as a video feed for the full thing. A full five days later, Day 35 is finally ready for viewing.

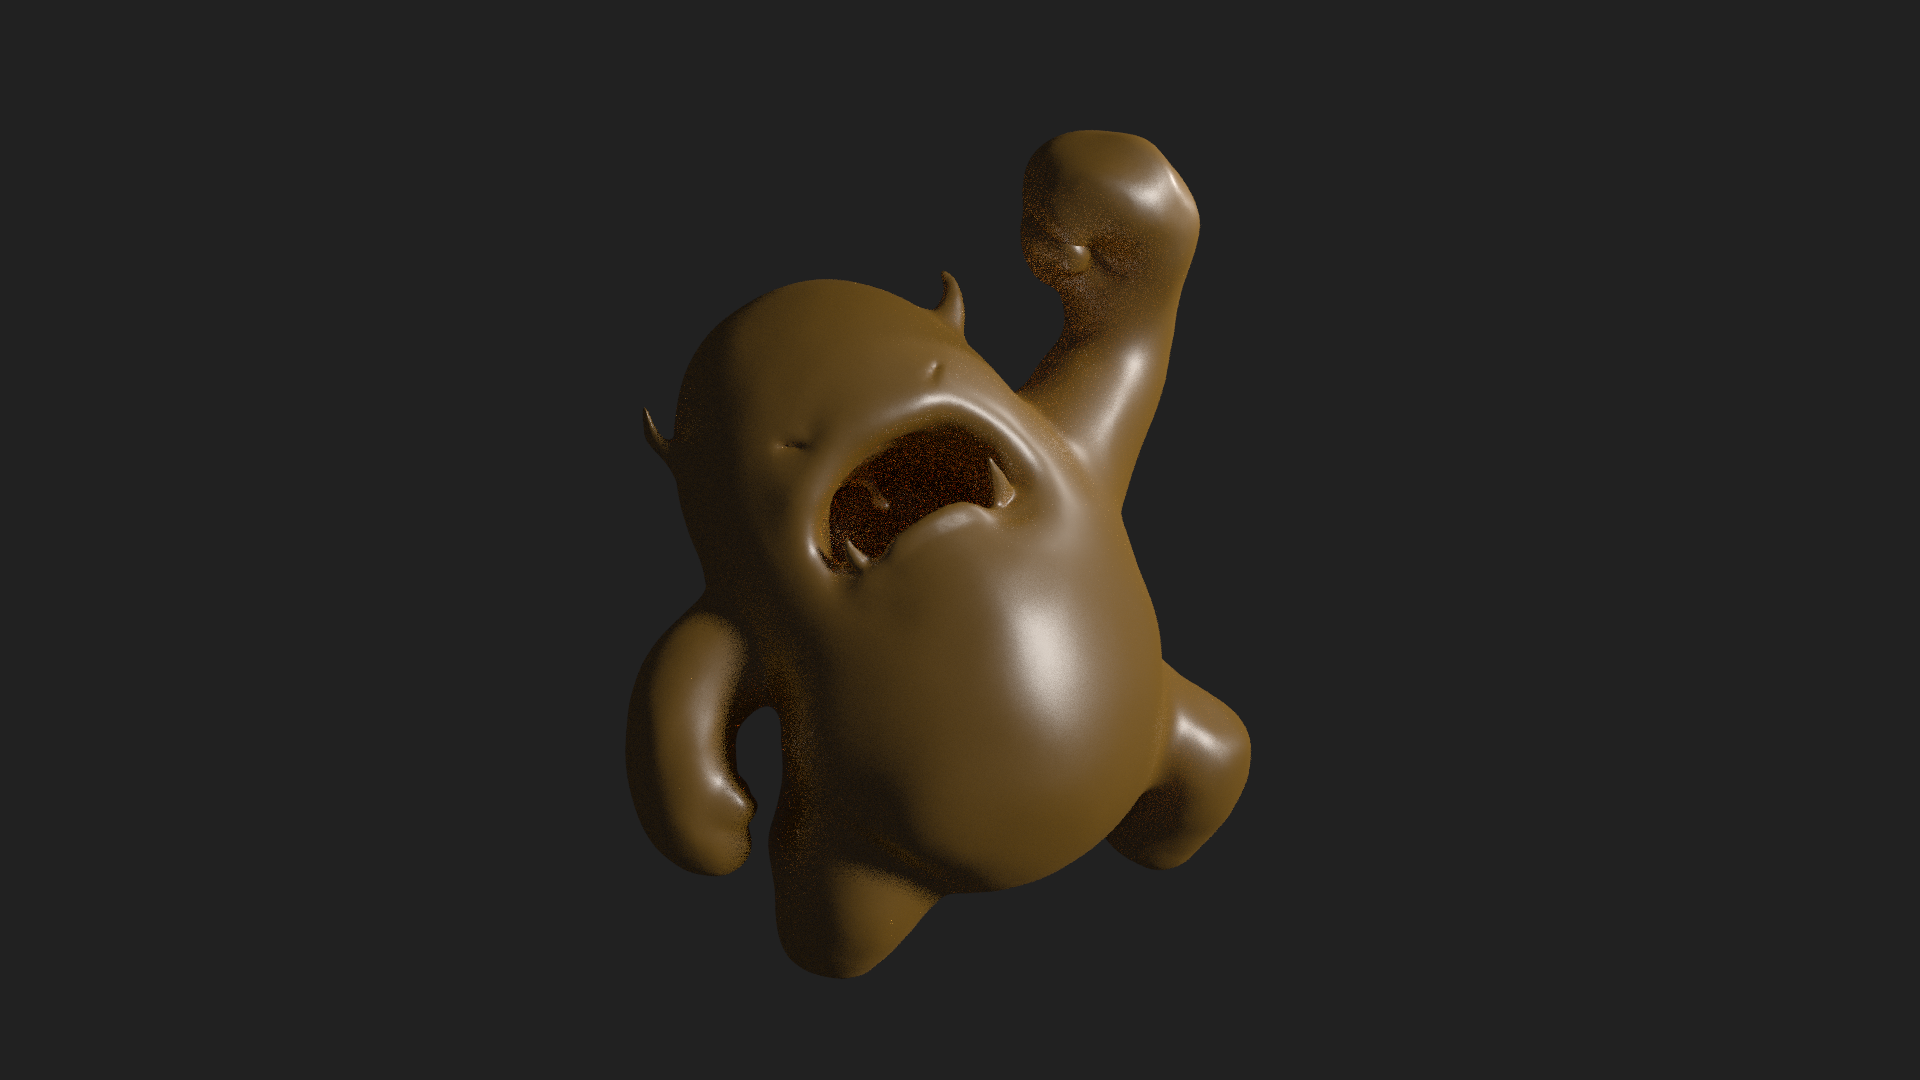
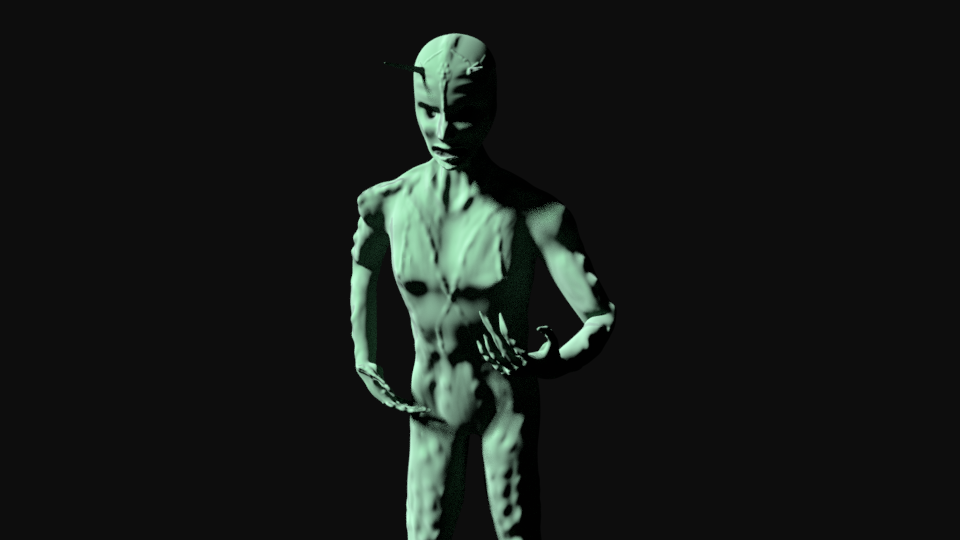
As for today’s actual work, I spent some time learning about retopology, which means I’ve got nothing to really show off. I did start working on a new sculpt, but it’s nowhere near finished.

Also, I *may* have skipped ahead a little bit and played around with a bit of composing.

Day 39

Today’s practice was all about the sculpt.

This little guy is named Melvin, he’s one of the CGCookie mascots, and the subject for their Fundamentals of Digital Sculpture course, as well as its final project. He was fun to make and good practice. I especially learned that I need to get some work in on things like teeth and horns, but I feel like going through the process helped a lot.


Day 38

A few days ago I was musing about how some days it seems like absolutely nothing is coming out right. Today, I’m glad to say, seems to be the opposite.

I took a second stab at modeling the honor tokens from Ascension, in the hopes of using that model for a how to play video recorded with Tabletop Studio. The first time around I decided that with the curves involved on the token it might be easier to go the sculpting route. I was horribly wrong about this. So today I took a different approach and tried the more traditional hard surface modeling techniques, and let some fancy work with the subdivision surface modifier and judicious creasing take care of the curvature. I’m not sure I could be happier with the result.

Now, the tabletop simulator doesn’t seem to have the options for the translucency that I used for the display render, but I think the crystals still look pretty decent all the same.

To follow that up I combined some of the array modifier techniques that I learned in the CGCookie classes with a Celtic jewelry making tutorial I found on line to produce this simple wire and clay amulet. Simple, but effective, and decent practice toward making more complicated patterns in the future.

And to follow up even further I decided to spend some time back in the 2d realm and put some time toward some art assets for Runic Alchemy. I’m working on getting the user interface up and operational at the moment, and I’ve been making do with simple text buttons and focusing more on function than form, but it is making it difficult to really get a bead on if the layout is going to work or not. So I made an initial test button. I don’t think that this is by far the final design, and I’ve only really put in the simplest detail, but that’s mainly because I’ll need to plug it into the game to see if it’s going to work visually. The detail that I have already gets lost if it’s scaled down too much, and I think it may hit those levels on a phone screen, so I need to balance the detail work and also make sure that the function of the button stays legible. Still, even with that being said, I’m pretty happy with it so far.

Day 37

Today’s work was encouraging, some of it at least. For the 30/30 I can’t say that I actually got very far, I watched my videos and spent a lot of time trying to sculpt a game asset with little success. I feel like it’s starting to come together, but there’s got to be a better way to go about it. Hopefully I’ll get to that video sooner rather than later.

The encouraging part comes in on the overall project front. I think I may be getting close to being able to begin at least some test work on my Let’s Talk About Games review series. After the issues I was having getting a render out for the Day 35 video I needed to rethink my plan for animating the game tutorials. It’s just not going to be feasible to produce those in blender at this stage. It was already pretty dicey, even if I get good at the animation it was likely going to be too much work in for too little result out to be worth making them that way, but throwing on render times on top of it makes that whole scenario a complete no go.

Even so, the reason I started considering animating the game tutorials in the first place goes back to the difficulty I was having getting viable shots when filming in person. I’m moderately certain I’m going to have to get a better camera option earlier than I wanted anyway, but even with a decent camera being able to quickly shift view between card closeups and table layouts and anything else I need to show to really bring home the game play is just going to be next to impossible to pull off, especially if I need to have my hands free to manipulate the game components as well. Going digital gives me a free roaming camera with as much zoom as I want and exactly the angles I want, and makes it easy.

With Blender out of the picture for that kind of work I’m turning instead to the Tabletop Simulator. I’ve worked out a decent workflow for getting enough cards from a given game scanned and imported into the simulation to do a decent demonstration with a minimum amount of prep time. I should be able to do the same fairly easily with game boards and dice. As my modeling skills improve I should be able to bring in unique game assets as well, like the Ascension honor token I was practicing with tonight. Put all of that together with screen record software and some fancy post-editing work in Blender and Photoshop, and I should have myself a pretty decent quality training video. And the beauty of using TTS is that the physics of it is already baked in, so there’s no real animation work required.

Day 36

So, today’s progress went a bit better, I feel, despite the fact that I still technically didn’t accomplish much.

Today was rendering day, as it turns out. Last night was supposed to be a video day, but I forgot until it was too late, so instead I decided to go animated. And since I’m diving deeper into Blender, I decided that my original spinning Runic Alchemy Focus wasn’t going to be quite good enough, so I souped it up a bit for the Day 35 Vlog post.

Unfortunately something about my changes has caused the render times to shoot through the roof, so most of my Blender learning session today revolved around trying to get that under control. Fortunately, today just happened to be the day I was going to be going through the CGCookie Rendering class anyway, so that was a nice coincidence.

The class was informative, but neither it nor a fairly exhaustive internet search on ways to speed up cycles rendering seems to be able to get the render times for this video under 19 hours, so I’m going to have to come up with a different solution. I have no idea what it will be yet, but it looks like Day 35 is going to be delayed for a while at least. At least Day 30 is finally up, I’ve been neglecting it a bit. That’s the downside of doing the video editing in Blender as well, it’s hard to practice modeling when your 3d application is busy rendering a youtube video. Ah well, it will all get there eventually.

On the plus side, even if I am sans video at least I am not 100% empty handed today. I started working on this sculpted character. I know I’m jumping ahead, since I haven’t watched the tutorials for the techniques or anything, but self practice can’t hurt.

He’s not finished yet, I’m sure I can get a few more levels of detail on there, especially since his facial hair is hardly recognizable as such. In his current state I thought he looked a bit like an Oz Munchkin mixed with Ego the Living Planet, so I decided to go with that theme for rendering out the progress so far.

Day 35

Some days nothing quite works out right. Unfortunately today seems to be one of those days.

I experimented around for far too long trying to find a way to get my dominoes placed properly, with no real luck. Doing them by hand makes it very time consuming and difficult to make the placement look nice, but at least the physics works out. Using the array modifier seems like a decent way to go, but it jacks up the controls for the rigidbody physics when you separate the copies out to be their own objects, and there doesn’t seem to be a way to use random dominoes from my collection. The particle hair system could be used to place them, in theory, and then have them turn into real objects, but if there’s a way to get the particles to orient themselves around a curve and actually, you know, curve, then I have not been able to find it yet. All in all I’ve managed to figure out several ways not to do it, and zero ways to actually do it.

So, realizing that there was no way I was going to complete that assignment and have something to show off, I decided I could at least try to implement one of the tutorials I watched earlier. Except that didn’t work out at all either. I’m fairly certain that I followed all of the steps, but something went wrong somewhere along the way and I ended up with a monstrosity. On the plus side I have enough of an understanding of the particle system now to know why it was a monstrosity, I’m just not sure why the one in the tutorial wasn’t as well.

Feeling really pressed for time, and not wanting to start over on that I thought I may as well just try a simple quick sculpt of an emoji style face, to express my ‘bleh’, but that led to technical issues with my tablet, followed by not being able to quite get the expression right. And by this point I am well and truly out of time for the evening and have nothing at all to show off. Oh, well. At least I leaned a bit. That’s got to count for something.

Day 34

Not much to show off here today, unfortunately. I did certainly get my 30 minutes in, probably closer to an hour / hour and a half, but I haven’t finished what I set out to accomplish.

Today was mostly focused on the video course for physics simulation in blender, learning the ins and outs of the built in physics systems and what they can do for particle effects, soft and rigid body collisions, dynamic painting, and the smoke and fire system. All very cool stuff, and something that I’m going to have to play around with with more scrutiny at a later date. Some of it will potentially be useful for the more immediate goal of character and environment modeling, but most of it falls in the “good to know” category for me at the moment, and I’m really only covering the videos because they are still a part of the introductory course, and you never know what will help to really sell a render.

That said, some of it could potentially be very helpful even if I’m trying to stick more strictly to modeling and sculpting. Cloth especially could come in handy, since you can use the cloth physics to get more realistic deformations for fabric models. The fire and smoke physics could come in handy, too. And the particle system has a wide array of applications, including dynamic hair, so that’s a plus. Even for creating static renders, you can run the simulation for a bit, find a point where things are doing what you want, and then incorporate that into your static scene. Very good stuff.

Aside from just watching videos, part of the challenge is actually doing something in Blender every day, preferably involving modeling. So I at least started one of the exercises. This one is a test of the rigid body system, by setting up a series of dominoes and knocking them over. I haven’t finished yet, I was able to model the domino (they provide one, but I am trying to learn to model after all), set up the physics, and get a small group of them to properly collide and fall. Tomorrow I’ll go through and try to set up an interesting pattern with them, and render the collapse. I think I want to try to practice some more advanced techniques for that, but it will require some research. I know there’s a way to have the particle system use objects from your scene as particles, and to spread them out over another mesh, and then make them real. In theory I should be able to use that method to lay out an interesting pattern of dominoes that I can then knock down. Combine that with an animated fly-by camera and some decent lighting, and I should have a pretty sweet little video, I’m just not there quite yet, and sleep is still something that is required.

So for now I’ll just share a quick snapshot of my little domino scene:


Day 33

So, today’s results were kind of a weird mixed bag.

I’m still going through the basics courses, so I did this exercise on lighting where you are given a bedroom scene, all ready to go except for the lights. The goal is to get decent lighting for a daytime scene and a nighttime scene.

This is what I came up with.

I think they look pretty nice, all in all.

The next course I looked at was character rigging fundamentals. They did the course with a model of their mascot, but I decided to be a bit extra and try to model up a character of my own to practice rigging with. It’s jumping ahead a bit, but I saw a decent tutorial on youtube, so I thought I’d give it a try.

The sad thing is, the simple character model turned into practice for things like multiresolution and sculpting, and while I think the end result was pretty cool, it took so long that I didn’t have time to really do any rigging today. So I tried out the last thing that they mentioned in the course: blender’s built in add-on for automatic rigging. Seemed like a good time-saver so I could at least give my guy an interesting pose and render it out for the blog.

The only problem is the automatic rig is super complex, and it didn’t work quite right out of the box. The course didn’t give any real instruction on how to actually use that one specifically, and I was having a heck of a time getting it to properly pose the character. I did eventually manage to get the hands working at least, so that’s set up.

Then, when I went to set up the lighting for the scene I discovered that for reasons unknown my character was completely invisible to standard lamps. It shows up for sun lamps and environment lighting, but it ignores all the rest. That also wasn’t something covered in the course, so I’m going to have to research it later to figure out where I went wrong.

Regardless, I did finally get a render of the character we’ve dubbed “Creepy Hands”, on account of the particularly creepy hands. They didn’t come out quite right in the original mesh, not unexpected since it’s my first time even attempting real hands. I tried to use the sculpting to fix them, but they just sort of warped and elongated and got, well, creepy. I think I actually know how to fix them now, but he already had a name, so there was no going back. I let the creepy hands inform the rest of the sculpt and let  my vaguely human low-poly character warp into this:

Early days still, but I think with a bit of practice I could actually make some really cool stuff with these sculpting tools. I just have to work out all of the do’s and don’ts around texturing and posing with sculpted models. But, that’s why I’m doing the training.

Day 32

So much CG goodness today!

As I said yesterday, I want to finish reviewing the basics courses before moving on and focusing on the modeling, even if that’s the main drive for this 30/30 challenge. It just seems like a good idea to have a basic understanding of the sorts of things I’m going to need.

So with that in mind, I reviewed the texturing course, and finally did the homework assignment to create this hand-painted axe:

Now, I can’t take full credit for this one. Since it’s an assignment exercise for texturing, they provided the axe model, I only did the unwrapping and texture painting. So, to make up for it a bit, I went ahead and made my own model and applied the same general techniques to it. Two in one practice, modeling and texturing! And bonus practice, since the hand painted texture plays off of several of the concepts I was studying during the drawing 30/30, and I got to bust out my tablet and stylus to do the detail work.

And, since I was on a roll, I went ahead and did the assignment for the shaders course, which was centered around coming up with a realistic looking material for a provided toy truck model. Since it’s not my model, and uploading to Sketchfab wasn’t required for the assignment, you won’t find it there, but I do have the final render for you to check out here.

I think that’s some pretty good looking plastic.

Day 31

Day 31 of the Journey, and Day 1 of the new Blender centric 30/30 3d challenge. To kick things off right, I decided it was best to review what I’ve already learned to get a refresher and make sure that I’m not missing out on some key concept or tool, or simply forgetting about something that would make the rest of the learning process faster. I’ve already covered most of this material, but this time I’m going through it with a more hands on approach, actively following along in the application. I haven’t hit anything yet that I’d completely forgotten about, but the refreshers on some of the basic modeling tools have been nice.

With that in mind, I did one of the early assignments from an introductory video that I managed to somehow completely miss the last time around (assuming it existed the first time? It could be new.) The assignment was simple enough. Make something, anything, using the basic primitive shapes that the program provides. One of the suggestions was a snowman, and I thought that sounded fun. So here you go:

Of course, even though I’m pretty new at this, I’m still a bit beyond simple primitive stacking, so I had to have another go at it. For snowman version two I did some simple mesh editing, cleaning up the intersection geometry and giving a bit more shape to the top hat and the carrot nose. And I followed it up by busting together a rudimentary set of procedural textures. Here’s the end result:

Not super different, but I think it adds some nice touches.

For some added fun, you can view both versions of the snowman in their (nearly) full glory through Sketchfab. I say nearly because the textures don’t really import properly from blender’s cycles render engine to the Sketchfab realtime viewer, but it’s pretty close, and you can actually change your view and look at the whole model.